Create Custom DDLC Dialogue Scenes in Your Browser
Doki Doki Dialog Generator is a free creative workspace for turning an idea into a Doki Doki Literature Club-style scene. Start with a character, choose a pose and expression, write the line that matters, and place the moment in a setting that fits the mood. The result can be a single reaction image, a dramatic comic panel, a visual novel mockup, or the opening beat of a longer fan story.
The generator is built for the part of writing that is hard to describe with plain text. A lowered gaze, a crossed-arm pose, an empty clubroom, or a corrupted textbox can change the meaning of the same sentence. Use the studio above to test those choices quickly. You can sketch a joke, stage a confrontation, build a tender conversation, or try several versions of the same scene until the characters feel right.
No modding setup is required. There is no Ren'Py project to configure and no image editor to learn before the first draft. Open the generator, make a scene, and keep refining it. For a closer look at the available cast, poses, and visual language, visit the DDLC characters and sprites guide.
How to Use Doki Doki Dialog Generator
Doki Doki Dialog Generator lets you build a complete DDLC dialogue scene in three clear steps. Open the studio, make one visual choice at a time, then export the finished panel when the scene says exactly what you want it to say.
1. Start a DDLC Dialogue Scene
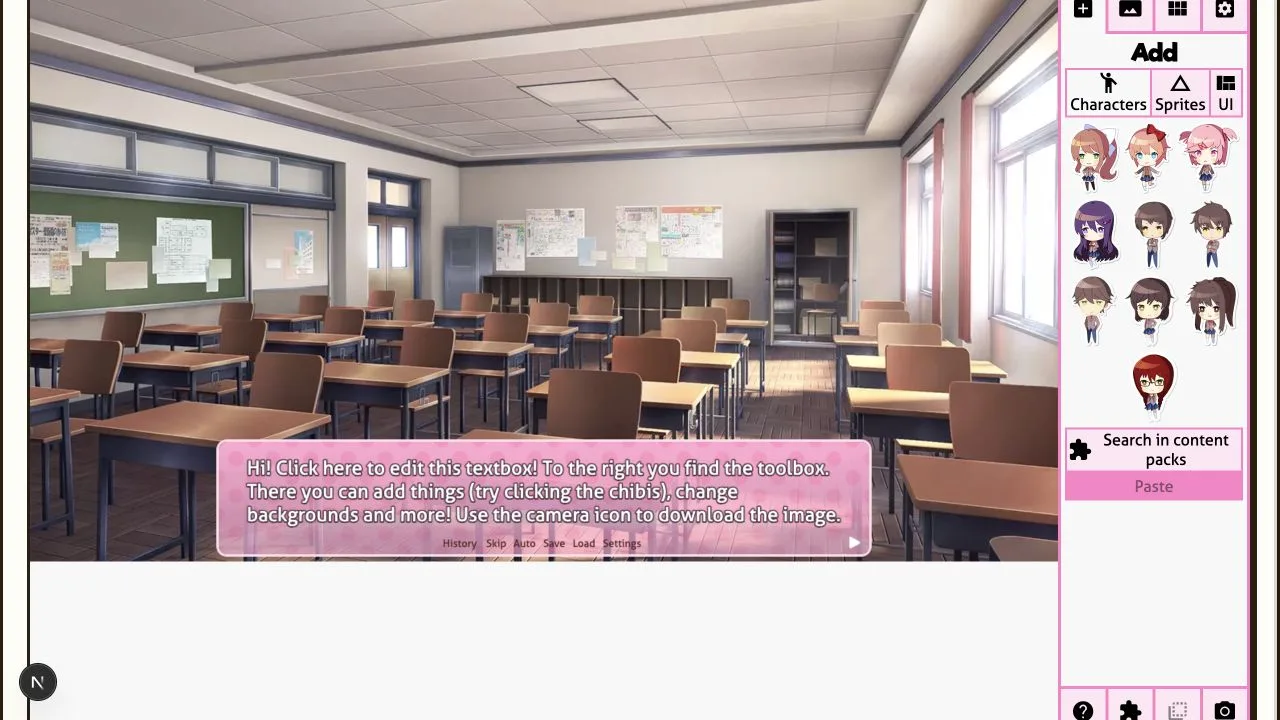
Open Doki Doki Dialog Generator and choose a character from the Add panel. The DDLC scene generator places your selection directly into the current background, so you can judge the composition immediately.
Use this first step to establish the speaker, setting, and emotional direction before writing a long conversation.
2. Add a Character and Refine the Mood
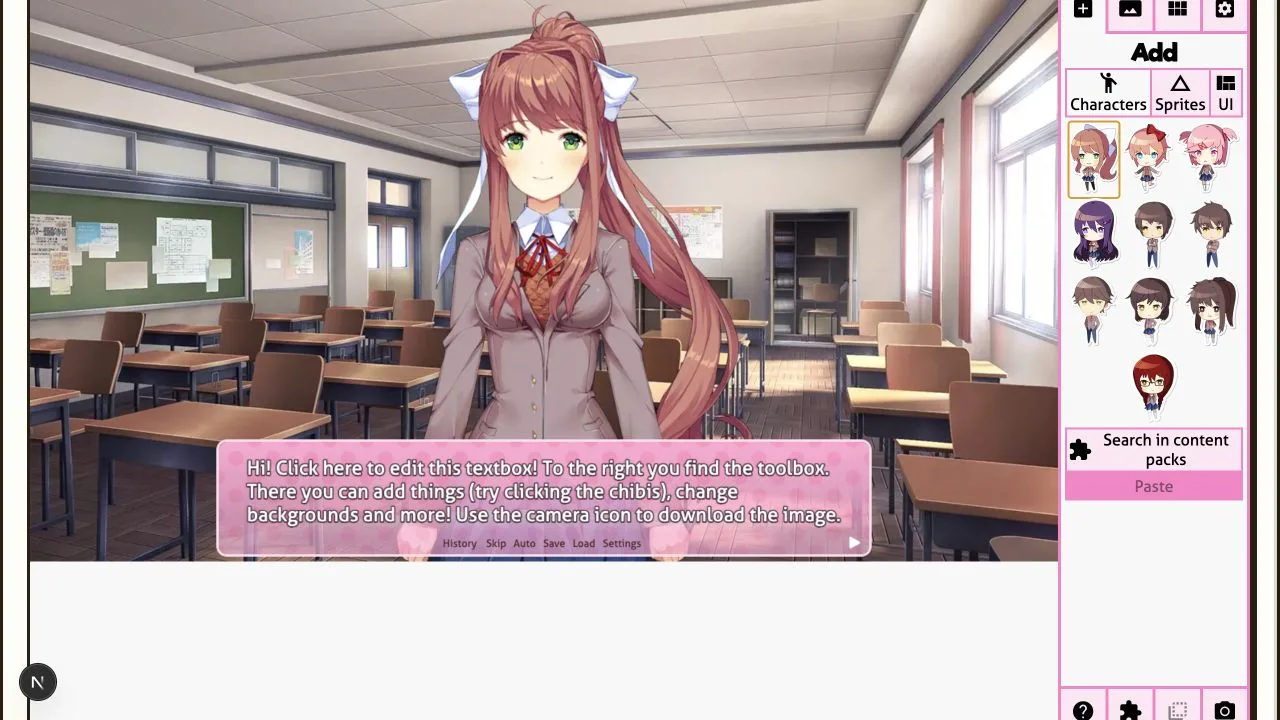
Select a character, then revise the pose, expression, and background until the DDLC dialogue scene has a clear feeling. Doki Doki Dialog Generator makes these comparisons fast enough to test several versions of one idea.
A small expression change can turn the same line into a joke, a confession, a confrontation, or a quiet reaction.
3. Export Your DDLC Comic Panel
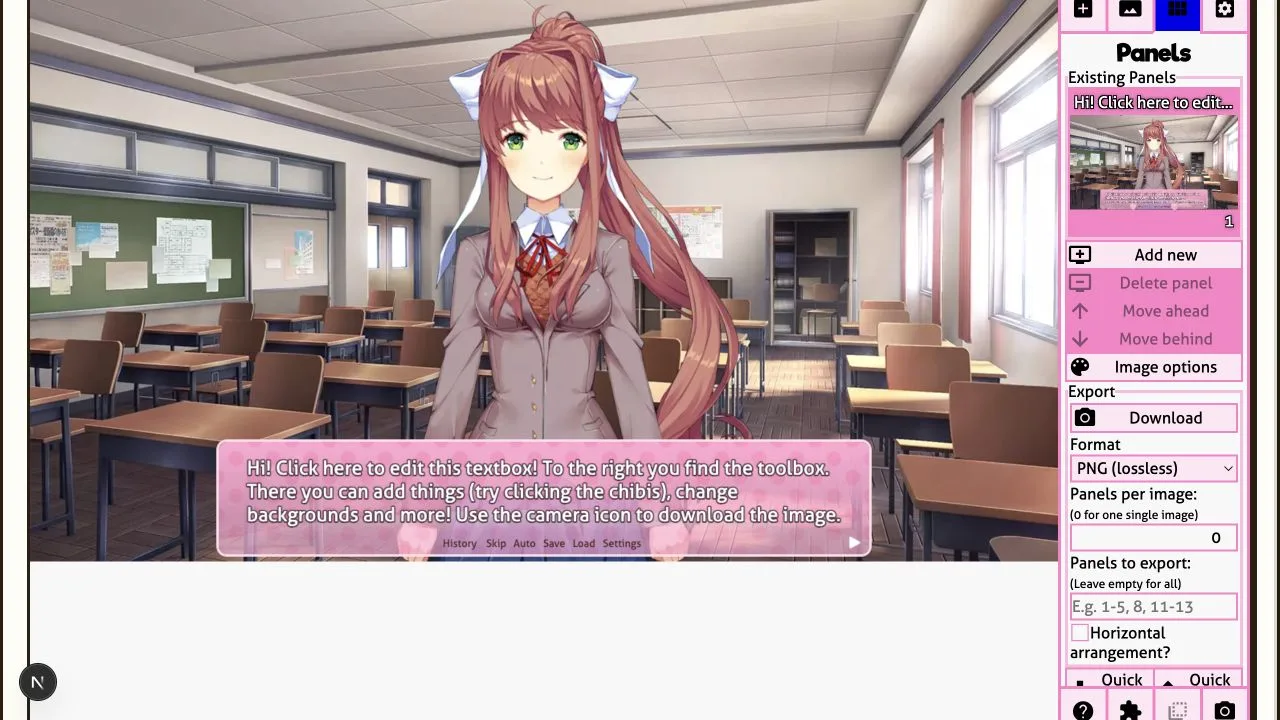
Open Panels when your Doki Doki Dialog Generator scene is ready. Choose PNG, WebP, JPEG, or another available format, then use Download to save the DDLC comic panel for your story, meme, or social post.
Keep alternate versions when a scene matters. The DDLC dialogue generator makes it easy to compare framing and dialogue before you publish.
How to Make a Doki Doki Literature Club Scene
Begin with the feeling you want the panel to carry. A cheerful Sayori line needs different framing from a quiet Yuri confession. A joke between Natsuki and the protagonist can work with an ordinary classroom background, while a Monika scene can become unsettling with a darker setting, a careful pause, and a single line of dialogue. Deciding the emotion first makes every later choice easier.
- Choose the speaker. Pick the character whose point of view drives the moment. Their pose gives the reader an immediate clue about confidence, embarrassment, frustration, affection, or fear.
- Set the expression and pose. Small expression changes are useful for pacing. A neutral look can make a punchline land harder, while a blush or averted gaze can make a quiet line feel more personal.
- Place the scene. Use a familiar clubroom for everyday dialogue, then change the environment when the story needs a stronger turn. Background choice acts like a stage direction before anyone speaks.
- Write concise dialogue. Visual novel dialogue works best when the panel can breathe. Give one line a purpose, then let the expression, textbox, and pause carry the rest of the emotion.
- Preview and revise. Read the image as a viewer would. If the line feels too long, shorten it. If the tone is unclear, change the face, background, or textbox before adding more words.
This process also works for original characters, alternate universes, meme templates, and fan-fiction storyboards. The scene does not need to imitate a game route exactly. It needs a clear idea, readable dialogue, and a visual choice that supports the idea.
Tools for Comics, Fan Fiction, Memes, and Storyboards
A dialogue generator is most useful when it helps you move from a rough thought to a shareable image without breaking your momentum. Use it to make a cover image for a fan-fiction chapter, test a conversation before writing the prose around it, or create a sequence of panels for a comic. A simple scene can also become a reference for voice acting, animation planning, video editing, roleplay prompts, and character analysis.
For comics, build one panel at a time and keep the visual changes deliberate. Let a character's posture change before their mood changes in the dialogue. Reuse a background when the conversation is grounded, then swap it when the scene shifts. For memes, make the contrast immediate: pair an overly serious expression with an ordinary line, or give a casual comment the visual treatment of a major revelation. For storyboards, focus on continuity. Keep the setting, character placement, and emotional progression clear from panel to panel.
The generator also supports experimentation. Try the same line with Monika, Sayori, Natsuki, Yuri, or MC. Change only the expression and compare the result. That is a quick way to discover whether a scene belongs to a different character, whether a line needs rewriting, or whether the story needs a more specific point of view. The user guide covers a practical scene-building workflow when you want a structured starting point.
Make Dialogue Feel Like a Visual Novel Moment
Strong visual novel scenes give every element a job. Dialogue tells the reader what is being said. Expression reveals what is being held back. Pose establishes energy and distance. The textbox controls emphasis. The background gives the moment a place in time. When these choices agree, even a short exchange feels intentional.
Keep one panel focused on one emotional beat. A character can be excited, guarded, relieved, irritated, uncertain, or frightened, but asking one image to perform every emotion at once makes the scene harder to read. Split larger conversations into separate panels. Give a reaction its own frame. Let silence have space. A close, simple panel often has more impact than a crowded scene with too many ideas competing for attention.
Textbox style can carry meaning too. A familiar bright box supports light conversation. A darker or distorted treatment can signal that something has shifted before the reader reaches the words. Use effects with purpose. They are strongest when they sharpen a moment that already has emotional weight.
Build Better Scenes Through Small Revisions
The fastest way to improve a custom dialogue scene is to change one thing at a time. Keep the line, then test a different expression. Keep the character pose, then try a quieter background. Keep the scene exactly as it is, then remove half the dialogue. Each comparison shows which part of the panel is doing the real storytelling. You do not need a perfect first draft when the studio makes revision immediate.
Start with a simple version that clearly communicates who is speaking and how they feel. Add details only when they make that reading sharper. A second character can create tension or warmth. A background can establish routine, distance, or danger. A visual effect can make a turn in the story unmistakable. If an addition does not change the reader's understanding, leave it out and give the strongest elements room to work.
Save a few alternatives before choosing a final image. Writers can use them to compare dialogue beats, artists can use them as composition references, and editors can use them as a visual outline for a larger project. A well-made scene often begins as an experiment, then becomes the version that defines a chapter, a joke, or a character relationship.
Read the finished panel at the size your audience will actually see. On a phone, long dialogue and tiny visual details disappear quickly. On a larger screen, awkward spacing or an unbalanced composition becomes more obvious. Adjust the scene for clarity before adding decoration. A readable name, a focused expression, and one memorable line will carry farther than a panel that asks the viewer to decode too many details at once. That discipline is useful whether you are making a quick reaction image or planning a complete DDLC fan comic.
Export a Scene and Keep Creating
When the scene looks right, export it as an image and use it where your project lives. It can become a social post, a Discord reaction, a comic panel, a YouTube community image, a video thumbnail concept, or part of a private writing board. Save early versions as well as finished ones. The first version often captures an idea that becomes useful later, even after the dialogue changes.
Build variations when a scene matters. One version can be warm and hopeful, another awkward and funny, and a third unsettling. Those alternatives help you find the strongest reading of the moment. They also make it easier to share a work in progress with collaborators, compare dialogue options, or return to an abandoned story with fresh eyes.
Doki Doki Literature Club and its characters belong to Team Salvato. This generator is an unofficial fan-made tool. Keep fan works respectful of the source material and the applicable fan-content rules. Read the terms of servicefor the project's usage details.
Doki Doki Dialog Generator FAQ
Is Doki Doki Dialog Generator free to use?
Yes. The studio is available in your browser for making custom DDLC-style dialogue scenes and image panels.
Do I need to install a game, mod, or image editor?
No. Open the studio, create the scene in the browser, and export the result when you are ready. The workflow is designed for fast drafting as well as careful scene construction.
What can I make with it?
Use it for dialogue comics, reaction images, fan-fiction illustrations, visual novel mockups, memes, roleplay prompts, storyboards, and character-writing exercises.
Which characters are available?
You can build scenes around Monika, Sayori, Natsuki, Yuri, and the protagonist. Explore the character guide for ideas on poses, expressions, and scene direction.